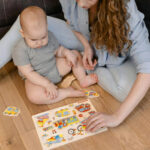

Watching your little one reach for your dinner plate is such an exciting moment. It usually means they’re getting curious about food, and you might be wondering where to begin. Learning how to make stage 1 baby food at home is one of the simplest, most rewarding things you can do for your baby’s first taste of the world beyond milk.
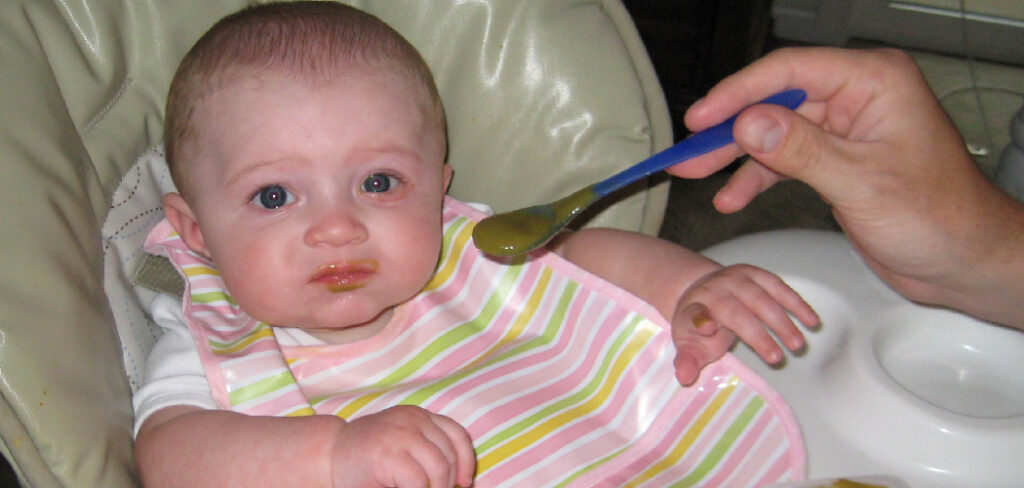
The good news? You don’t need fancy skills or expensive gadgets. With a few fresh ingredients and a little time, you can whip up smooth, nourishing purees that your baby will love. This guide walks you through everything — the benefits, the timing, the steps, storage tips, and how to keep mealtime safe and happy.
What Is Stage 1 Baby Food?
Stage 1 baby food is the very first solid food your baby tries. It’s smooth, thin, and made from a single ingredient, like sweet potato or apple. The simple texture is gentle on tiny tummies that have only ever known breast milk or formula.
Think of it as a soft introduction. Your baby is learning a whole new skill — moving food from the front of the mouth to the back and swallowing. Stage 1 foods make that learning curve nice and easy.
Benefits of Stage 1 Baby Food for Babies
First foods do more than fill little bellies. They give your baby important nutrients that milk alone can’t fully cover after six months.
Single-ingredient purees are packed with vitamins and minerals. Sweet potato offers vitamin A for healthy eyes. Peas bring protein and fiber. Apples and pears add gentle sweetness along with vitamin C.
Starting with one ingredient at a time has another big perk. If your baby reacts to something, you’ll know exactly which food caused it. This makes spotting any sensitivity so much easier.
Homemade stage 1 food also helps shape your baby’s taste buds. By offering simple, natural flavors early, you’re helping them grow into an adventurous eater down the road.
When Can Babies Start Stage 1 Baby Food
Most babies are ready for solids around 6 months of age. Before this point, their digestive systems are still developing, and milk gives them everything they need.
Age isn’t the only thing to watch, though. Your baby should also show clear signs of readiness, which I’ll cover in more detail below.
Look for these key signals:
- They can sit up well with little or no support.
- They have good head and neck control.
- They show interest in food, watching you eat or reaching for your plate.
- They’ve lost the tongue-thrust reflex, meaning they no longer push food straight back out.
If your baby checks these boxes around the six-month mark, you’re good to go. When in doubt, a quick chat with your pediatrician can put your mind at ease.
What You’ll Need
One of the best parts of making stage 1 baby food is how little you need. You likely have most of it in your kitchen already.
Ingredients to Start With
Pick one of these gentle, baby-friendly favorites:
- Sweet potato – naturally sweet and creamy
- Butternut squash – soft and mild
- Carrots – slightly sweet and full of vitamins
- Peas – great for a pop of green
- Apples – classic and easy to digest
- Pears – soft, sweet, and gentle on tummies
Equipment
You don’t need much to get started:
- A steamer basket or a pot with a lid
- A blender, food processor, or hand blender
- A fork or potato masher for chunkier textures later
- Ice cube trays for freezing portions
- A few small storage containers
That’s it. Simple tools, simple food, happy baby.
Step-by-Step Preparation Guide on How to Make Stage 1 Baby Food
Here’s the fun part. Follow these steps and you’ll have a fresh batch of puree ready in no time.
- Wash your hands and your workspace. Clean surfaces keep your baby’s food safe.
- Rinse the produce well under running water to remove any dirt.
- Peel and chop your chosen ingredient into small, even pieces. Smaller pieces cook faster and blend smoother.
- Steam until soft. Steaming keeps more nutrients than boiling. Most veggies and fruits take 8 to 15 minutes, depending on size. They’re ready when a fork slides through easily.
- Let it cool slightly, then add the cooked food to your blender.
- Blend until silky smooth. Add a little of the steaming water, breast milk, or formula to thin it out to the right consistency.
- Test the temperature before serving. It should feel lukewarm, never hot.
And there you have it — homemade stage 1 baby food made with love.
How to Serve by Age and Stage
As your baby grows, their food should grow up too. Texture changes help them build new chewing and swallowing skills.
Around 6 Months: Smooth Purees
Start with very smooth, runny purees. At this stage, your baby is just getting the hang of eating. Thin, lump-free textures are easiest to manage.
Around 8 Months: Mashed with Soft Lumps
Once your baby is comfortable with smooth food, thicken things up. Mash food with a fork and leave small, soft lumps. This encourages them to practice moving food around their mouth.
Around 9 to 12 Months: Soft Finger Foods
Now your little one is ready to explore. Offer soft, bite-sized pieces they can pick up themselves, like steamed carrot sticks or soft fruit chunks. Always stay close and supervise during meals.
Storage and Freezing Tips
Making a big batch saves you so much time. Here’s how to store it safely.
For the fridge, keep purees in a sealed container and use them within 48 hours. Always label with the date so you don’t lose track.
For longer storage, freezing is your best friend. Spoon puree into clean ice cube trays, freeze, then pop the cubes into a labeled freezer bag. Frozen baby food keeps well for up to three months.
When you’re ready to serve, thaw a cube in the fridge overnight or gently warm it on the stove. Stir well and check the temperature before feeding. Never refreeze food that’s already been thawed, and toss any leftovers your baby didn’t finish.
Common Mistakes to Avoid
Every parent learns as they go. Knowing these common slip-ups ahead of time can save you some stress.
Adding salt or sugar. Babies don’t need either, and their kidneys can’t handle salt well. Keep flavors natural and simple.
Serving food too hot. Microwaves heat unevenly and can create hot spots. Always stir and test before serving.
Introducing too many new foods at once. Stick to one ingredient at a time for a few days. This helps you spot any reactions easily.
Rushing the textures. There’s no need to hurry to lumps or finger foods. Let your baby set the pace and move up when they seem ready.
Forcing your baby to finish. Babies are great at knowing when they’re full. If they turn away or close their mouth, that’s okay. Mealtime should be relaxed and pressure-free.
Safety Tips
Keeping your baby safe at mealtime is always the top priority. A little caution goes a long way.
Always supervise your baby while they eat, and make sure they’re sitting upright. Never leave them alone with food, even for a moment.
To reduce choking risk, keep stage 1 textures smooth and avoid hard, round, or sticky foods. Skip whole grapes, nuts, popcorn, and chunks of raw veggies until they’re much older.
When it comes to allergies, introduce one new food every few days. Common allergens like eggs, dairy, peanuts, fish, and wheat can be introduced too, but offer them one at a time so you can watch for any reaction. If your family has a history of food allergies, talk with your pediatrician before starting.
Signs Baby Is Ready and Enjoying It
It’s natural to wonder if you’re “doing it right.” Here’s some reassurance — your baby will show you how they feel.
Happy signs include opening their mouth for the spoon, leaning in toward food, and swallowing without fuss. A smiley, relaxed baby is usually an enjoying baby.
Don’t worry if the first few attempts are messy or your baby makes funny faces. New flavors take getting used to. Some foods need to be offered ten or more times before a baby accepts them, so keep trying gently.
If your baby pushes food out at first, that doesn’t always mean dislike. They’re simply learning a brand-new skill, and practice makes perfect.
When to Call a Doctor
Most of the time, starting solids goes smoothly. Still, it helps to know the warning signs that need attention.
Reach out to your doctor right away if your baby shows any of these after eating:
- Hives, swelling, or a rash, especially around the face or mouth
- Trouble breathing, wheezing, or persistent coughing
- Vomiting or diarrhea that seems severe or won’t stop
- Excessive fussiness or signs of tummy pain
If you ever see signs of choking — silence, struggling to breathe, or turning blue — call emergency services immediately. Trust your instincts. You know your baby best, and it’s always okay to ask for help.
Frequently Asked Questions
How much stage 1 food should my baby eat?
Start small, with just one or two teaspoons once a day. Your baby is still getting most of their nutrition from milk, so this is about learning, not filling up. Let them guide how much they want.
Do I need to cook fruits like banana or avocado?
No, soft fruits like banana and ripe avocado can be served raw. Just mash them well until smooth. They make perfect no-cook first foods.
Can I mix breast milk or formula into the puree?
Absolutely. Adding a little breast milk or formula thins the texture and gives a familiar, comforting flavor. It’s a lovely way to ease your baby into solids.
How many new foods can I introduce in a week?
Introduce one new food every three to five days. This spacing makes it easy to notice if a particular food doesn’t agree with your baby.
What if my baby refuses the food?
Don’t worry, refusal is completely normal. Stay calm and try again in a day or two. Babies often need many tries before they warm up to a new flavor.
Final Thoughts
Learning how to make stage 1 baby food is a special milestone for both you and your little one. With a steamer, a blender, and some fresh ingredients, you can create simple, wholesome meals that nourish your baby and build healthy habits for life.
Remember, this is a journey, not a race. There will be messy moments, funny faces, and plenty of giggles along the way. Trust yourself, follow your baby’s cues, and enjoy every spoonful — you’re doing a wonderful job.

About
Joann Meril didn’t plan on becoming a parenting writer — it found her. After spending several years working as a certified nursing assistant in a pediatric clinic, Joann saw firsthand how anxious and under-informed new parents could feel, even with a hospital full of resources around them. When she had her own two children, that gap became personal. Suddenly she was the one googling things at 2 a.m., comparing baby monitors, and wondering if the swaddle she bought was actually safe.
That experience is what shaped her approach to writing. Joann believes parenting advice should be practical, honest, and free of unnecessary jargon or guilt. She tests products herself whenever possible, reads the actual safety standards instead of just the marketing copy, and isn’t afraid to say when something isn’t worth the money.
Today, Joann writes full-time, covering everything from newborn sleep routines to gear reviews to the small everyday wins that make parenting feel a little less overwhelming. When she’s not researching or writing, she’s usually chasing her own kids around the backyard or drinking coffee that’s gone cold for the third time that morning.
Joann lives in [City/State] with her husband and two children.
Credibility
- Background in pediatric caregiving (CNA)
- Mom of two, hands-on parenting experience
- Hand-tests baby gear before recommending it
- Focus: infant sleep, feeding, gear safety, early development