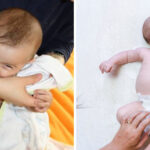

A handmade baby headband should feel soft, look sweet, and stay comfortable without squeezing delicate skin. For beginners, the best designs use gentle stretch, smooth seams, and lightweight details that do not pull or scratch. Learning how to make headbands for babies also gives you control over fabric choice, size, color, and safety, which matters more than any trendy style.

You will learn how to choose baby-safe materials, measure for comfort, build a fabric bow or flower, attach it securely, and check the finished fit before use. You will also learn what mistakes to avoid so your DIY baby headbands feel as good as they look. This guide’s purpose is to help you create soft, safe, beginner-friendly baby headbands with confidence.
Why Making Baby Headbands Is a Useful Beginner Skill
Making baby headbands is a simple craft with real value. You can create handmade baby accessories for photos, birthdays, baby showers, holidays, or everyday outfits without needing advanced sewing skills. A small strip of soft stretch nylon or knit fabric can become a thoughtful gift idea in less than an hour.
This skill also teaches you the basics of working with elastic headband materials, soft seams, fabric glue, and simple embellishments. You learn to think about comfort first, which is essential for newborn headband comfort and infant headband fit. Once you understand the basics, you can make matching sets, adjust sizes as a baby grows, and choose colors that feel personal rather than mass-produced.
Tools and Materials You’ll Need
Start with soft nylon headband bands or a smooth stretch knit fabric that feels gentle when rubbed against your wrist. You will also need felt for backing, fabric scissors, a measuring tape, and either fabric glue or a needle and thread. Small clips can hold pieces in place while you check placement and alignment.
For decoration, choose lightweight embellishments such as a fabric bow, soft flower, or flat felt shape. Avoid scratchy trims, sharp edges, heavy decorations, or loose small parts that could detach.
An optional rotary cutter with a self-healing mat can make cleaner cuts, especially if you plan to make several headbands. It is convenient, but fabric scissors work well for your first project.
9 Step-by-Step Guide on How to Make Headbands for Babies
Step 1 – Choose Soft, Baby-Safe Materials
Begin with texture. Touch every material before you use it, and ask whether it would feel pleasant against a baby’s forehead. Soft stretch nylon, lightweight cotton knit, and smooth jersey fabric are usually good choices because they bend easily and feel gentle.
Avoid stiff elastic, glitter trim, rough lace, beads, buttons, rhinestones, or anything that could scratch or come loose. Baby-safe materials should be flexible, breathable, and light. If the fabric feels scratchy on your inner wrist, it will likely bother a baby.
When learning how to make headbands for babies, think of comfort as the design rule that guides every choice. A simple soft band is better than a fancy one that feels tight, heavy, or irritating.
Step 2 – Measure Gently for the Right Fit
Measure with care, not pressure. Wrap a flexible measuring tape around the baby’s head where the headband will sit, usually across the forehead and around the back of the head. The tape should touch the skin lightly without leaving a mark.
If you are making a gift and cannot measure the baby, use a general size as a starting point, but keep the band extra stretchy and gentle. Newborns and infants vary a lot, so a soft, forgiving fit matters more than a perfect number.
For an elastic headband, make the finished size slightly smaller than the head measurement only if the material has gentle stretch. It should stay in place without creating red lines.
Step 3 – Cut the Band and Fabric Pieces
Lay your fabric flat on a clean table. Smooth it with your palm so there are no wrinkles or twists. If you use soft stretch nylon bands, you may already have a pre-made loop and can move straight to the embellishment.
For a knit fabric band, cut a strip with clean edges using fabric scissors or a rotary cutter. The fabric should stretch around the head without rolling too much. Keep the strip wide enough to feel soft, but not so wide that it slips over the eyes.
Cut small felt pieces for backing the decoration. Felt adds structure and gives glue or stitches a stable place to hold, while keeping the underside smooth.
Step 4 – Shape a Bow, Flower, or Simple Accent
A fabric bow is one of the easiest beginner embellishments. Cut a small rectangle of soft fabric, pinch it in the center, and wrap a narrow strip around the middle. The fabric will gather into soft folds, giving the bow a gentle, puffy shape.
If you prefer a flower, use soft felt or knit fabric circles layered together. Keep the shape flat and lightweight so it does not tug on the band. Heavy embellishments can pull the headband forward or make it uncomfortable.
Hold the decoration against the band before attaching it. Check that the size looks balanced and does not cover too much of the baby’s forehead.
Step 5 – Assemble the Headband Base
If you are sewing a knit band, fold the strip lengthwise with the soft side facing inward. Sew a simple seam along the long edge, then turn the tube right side out. The fabric may feel narrow as you turn it, so move slowly and avoid stretching it out of shape.
Bring the ends together and join them with a soft seam. Place the seam where it can hide under the embellishment or sit at the back without rubbing. A smooth finish matters because babies move, wiggle, and rest their heads often.
For a no-sew headband, use fabric glue carefully and let it dry fully before handling.
Step 6 – Attach the Embellishment Securely
Place the bow, flower, or felt accent on the band and check the position. Many makers place decorations slightly off-center for a classic baby headband look. Clip it in place first so you can view it from different angles before securing it.
Use a needle and thread for the strongest hold, especially on a fabric bow. Stitch through the backing and band several times, keeping knots tucked away from the skin side. If you use fabric glue, apply it only between layers and never where wet or dried adhesive may touch the baby’s skin directly.
This stage is where how to make headbands for babies becomes both creative and careful. Pretty details should always stay soft, light, and secure.
Step 7 – Check Stretch, Seams, and Skin Contact
Once the headband is assembled, stretch it gently in your hands. It should expand smoothly and return to shape without snapping, curling tightly, or feeling stiff. Run your fingers along every seam and glued area to check for bumps.
Turn the headband over and inspect the side that will touch the baby. A soft seam should feel flat, not raised or scratchy. If you feel a hard knot, rough glue edge, or stiff corner, cover it with a smooth felt backing or remake that part.
A good infant headband fit should feel light and barely noticeable. The band should never press into the skin or leave deep marks.
Step 8 – Finish the Details for a Polished Look
Trim loose threads, uneven fabric edges, and extra felt from the backing. Small finishing touches make the headband look professional and feel better during wear. Use sharp fabric scissors so the edges look clean rather than jagged.
If you used glue, let the headband cure according to the glue’s directions. Dry to the touch does not always mean fully set. Waiting longer helps prevent shifting and keeps the decoration secure.
Check the final shape in natural light. The colors, folds, and seams are easier to see near a window. A soft peach bow, a cream nylon band, or a tiny floral accent can look simple and elegant when the details are neat.
Step 9 – Store, Gift, and Use Safely
Store finished baby headbands flat in a clean drawer, soft pouch, or small gift box. Keep them away from dust, moisture, pets, and anything that could snag the fabric. If you are gifting one, include a simple note reminding the caregiver to use it only with supervision.
Baby headbands are accessories, not sleepwear. Remove them before naps, bedtime, or car seat use, and check the fit each time before placing one on a baby. Babies grow quickly, and a band that fit last month may feel too snug now.
For gifting, choose neutral colors, soft textures, and simple embellishments. A comfortable handmade headband often becomes more loved than a flashy one.
Common Mistakes When Making Baby Headbands
One common mistake is choosing style over comfort. A shiny trim, stiff lace, or large flower may look cute in photos, but it can bother a baby if it scratches, pulls, or feels heavy. Always test texture first and keep decorations light.
Another mistake is making the band too tight. Some beginners assume a snug fit is better because it will stay in place, but tight bands can leave marks and make a baby uncomfortable. Gentle stretch is the goal. The headband should rest softly, not grip.
Many crafters also use too much glue. Thick glue spots dry hard and can create rough edges. Use a small amount between fabric layers, and keep adhesive away from any area that may touch skin directly.
A fourth mistake is adding small loose parts. Buttons, beads, gems, and tiny charms can become hazards if they detach. If you want decoration, use soft fabric shapes, stitched bows, or flat felt accents instead.
Finally, beginners sometimes skip the final inspection. Before any baby wears the headband, check seams, stretch, backing, decoration strength, and overall softness.
Expert Tips
Make one test headband before cutting several pieces. This helps you learn how your fabric stretches, how glue dries, and how the finished size feels. Different materials behave differently, even when they look similar.
Choose lighter embellishments for newborn sizes and save larger bows for older babies, if appropriate. A tiny headband should not feel top-heavy or slide down over the eyes.
If you sew, use small, secure stitches and hide knots between layers. If you make a no-sew headband, use flexible fabric glue made for fabric, not craft glue that dries stiff. Most importantly, inspect the headband every time before use. Handmade baby accessories should stay soft, secure, and comfortable from the first wear to the last.
Frequently Asked Questions
What Is the Best Fabric for Baby Headbands?
Soft stretch nylon, cotton knit, and jersey fabric are great beginner choices because they feel smooth and move gently with the baby’s head. The best fabric should stretch without feeling tight and should not have rough edges. Avoid stiff elastic, scratchy lace, glitter fabric, or anything that sheds. Comfort and softness matter more than thickness or decoration.
Can I Make a Baby Headband Without Sewing?
Yes, you can make a no-sew headband with soft nylon bands, felt backing, fabric flowers, and flexible fabric glue. The key is to use glue sparingly and place it only between layers, not where it can touch the baby’s skin. Let it dry completely before use. For extra safety, tug gently on the embellishment to check that it is secure.
How Tight Should a Baby Headband Be?
A baby headband should rest gently and never squeeze. It should stay in place during supervised wear, but it should not leave deep marks, press into the forehead, or feel hard to stretch. If you are unsure, choose a softer, stretchier band and check the fit often. Babies grow quickly, so a comfortable fit can change within weeks.
Are Bows and Flowers Safe for Baby Headbands?
Bows and flowers can be safe when they are soft, lightweight, and firmly attached. Fabric bows, felt flowers, and flat knit accents are better than beads, gems, buttons, or heavy decorations. Avoid anything with sharp edges or loose small parts. Always supervise a baby wearing a headband and remove it before sleep, naps, or car seat time.
What Size Should I Make for a Newborn?
Newborn sizing varies, so comfort matters more than a fixed measurement. If you can measure, use a flexible tape and keep it loose around the head. If you are making a gift, use a soft stretch band that can adjust gently as needed. Avoid tight elastic and oversized decorations. A newborn headband should feel light, smooth, and barely noticeable.
Conclusion
Making baby headbands is a beginner-friendly craft when you focus on softness, stretch, and safety. Start with baby-safe materials, measure gently, cut cleanly, and choose lightweight decorations like a fabric bow or soft felt flower. Secure every seam or glued layer carefully, then check the finished headband for comfort before use.
The best DIY baby headbands do not need to be complicated. A smooth nylon band, a neat bow, and a soft backing can look beautiful while keeping newborn headband comfort at the center of the design. As you practice, you will get better at choosing colors, shaping embellishments, and creating polished handmade baby accessories.
Now that you know how to make headbands for babies, try one simple design first, inspect it closely, and use what you learn to make the next one even softer, safer, and more personal.

About
Joann Meril didn’t plan on becoming a parenting writer — it found her. After spending several years working as a certified nursing assistant in a pediatric clinic, Joann saw firsthand how anxious and under-informed new parents could feel, even with a hospital full of resources around them. When she had her own two children, that gap became personal. Suddenly she was the one googling things at 2 a.m., comparing baby monitors, and wondering if the swaddle she bought was actually safe.
That experience is what shaped her approach to writing. Joann believes parenting advice should be practical, honest, and free of unnecessary jargon or guilt. She tests products herself whenever possible, reads the actual safety standards instead of just the marketing copy, and isn’t afraid to say when something isn’t worth the money.
Today, Joann writes full-time, covering everything from newborn sleep routines to gear reviews to the small everyday wins that make parenting feel a little less overwhelming. When she’s not researching or writing, she’s usually chasing her own kids around the backyard or drinking coffee that’s gone cold for the third time that morning.
Joann lives in [City/State] with her husband and two children.
Credibility
- Background in pediatric caregiving (CNA)
- Mom of two, hands-on parenting experience
- Hand-tests baby gear before recommending it
- Focus: infant sleep, feeding, gear safety, early development