
Your baby’s tiny fingers will not stay tiny for long, which is why a baby handprint can feel so special. It captures a real moment you can frame, gift, or tuck into a memory box. If you are wondering how to get baby handprint without stress, mess, or smudging, the secret is preparation, baby-safe materials, and a calm pace.
First-time parents often worry about using paint or pressing too hard. That is completely normal. With the right setup, you can make a sweet baby keepsake while keeping your newborn or infant safe and comfortable. This guide shows you how to choose materials, position your baby’s hand, make the print, clean up, and preserve the finished memory keepsake.
Why Baby Handprints Matter
Baby handprints matter because they turn a quick stage of life into something you can hold onto. Newborn hands change fast. Those curled fingers, soft palms, and tiny wrinkles may look different in just a few months.
Making a handprint craft also gives first-time parents a simple way to celebrate milestones. You can create one for a birth announcement, nursery frame, holiday ornament, baby book, or grandparent gift. It does not need to look perfect to be meaningful.
The process can also build confidence. You learn how to handle your baby’s hand gently, work with safe supplies, and stop when your baby needs a break. The real goal is not a flawless print; it is a safe, loving memory.
Tools and Materials You’ll Need
Gather everything before you start so you can keep one hand near your baby at all times. Choose baby-safe materials that are clearly labeled non-toxic and washable.
- Non-toxic paint, a baby-safe ink pad, or an air-dry clay imprint kit
- Thick cardstock, canvas, baby book page, or clay base
- Soft wipes, damp cloths, and warm water for clean-up
- Paper towels or an old towel to protect the surface
- A firm, flat work area with good lighting
- A clean diaper or blanket in case your baby needs comfort
- A frame, envelope, or folder for storing the finished print
- Optional: a second adult to help hold, soothe, or distract your baby
Avoid adult craft paint, permanent ink, or products with strong fumes.
Step-by-Step Guide on How to Get Baby Handprint
Step 1 – Choose the Right Time
Pick a calm time when your baby is fed, changed, and sleepy or relaxed. A drowsy infant often keeps the hand softer and less tense, which makes the print easier. If your baby is hungry, overstimulated, or crying, wait and try later.
A good plan for how to get baby handprint starts with your baby’s mood, not the supplies. Keep the room warm, quiet, and bright enough to see the tiny fingers clearly. If your baby curls the hand into a fist, do not force it open. Pause, cuddle, and try again when the hand naturally relaxes.
Step 2 – Prepare the Surface
Set your cardstock, canvas, or clay imprint base on a steady table or floor. Tape paper down if it slides. A moving surface can cause smudging, especially when your baby wiggles at the last second.
Place wipes, warm water, and a soft towel within easy reach. Open the ink pad or pour a small amount of non-toxic paint onto a plate before bringing your baby close. The setup should feel simple and controlled.
If you use clay, knead it first until it feels smooth and soft. A stiff clay surface needs more pressure, which is not ideal for a newborn or young infant.
Step 3 – Test the Material First
Before touching your baby’s skin, test the paint, ink pad, or clay with your own finger. Press lightly and see how much color or depth you get. This helps you learn how much gentle pressure you need.
For paint, the texture should feel smooth, not sticky or thick. Too much paint can blur the lines of the palm and tiny fingers. For an ink pad, check that the ink transfers evenly without soaking the skin.
If the material smells strong, stains heavily, or feels harsh, stop and choose something safer. Baby-safe materials should support the keepsake process, not create worry.
Step 4 – Open the Hand Gently
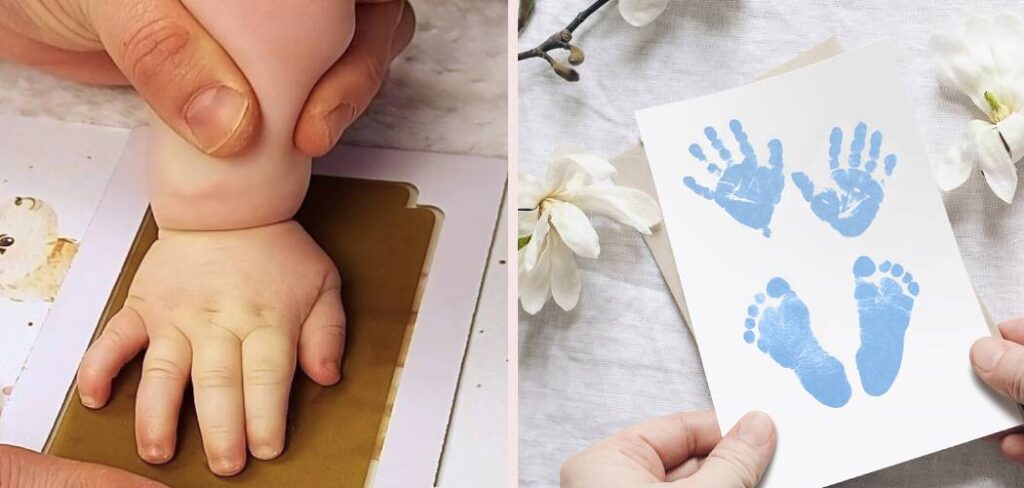
Hold your baby’s wrist with care and let the hand rest in your palm. Stroke the back of the hand or touch the base of the fingers to encourage a natural opening. Many babies curl their fingers by reflex, so patience matters.
Never pull fingers straight or press against resistance. If the hand stays closed, wait a moment. You can also try after a warm bath, feeding, or nap when the muscles feel more relaxed.
Speak softly while you work. Your voice, warmth, and steady touch can help your baby feel secure during this new sensation.
Step 5 – Apply Paint or Ink Lightly
If using non-toxic paint, brush a thin layer across the palm and fingers. The paint should look even and slightly shiny, not thick or dripping. Too much product causes smears and hides the sweet details.
If using an ink pad, gently press your baby’s palm onto the pad instead of rubbing. Make sure the fingertips get color too, since they often lift first. When learning how to get baby handprint, remember that light coverage and calm timing usually create a clearer print than heavy pressure.
Keep the product away from your baby’s mouth, eyes, and clothing. Supervise closely from start to finish.
Step 6 – Press the Hand Onto the Keepsake
Guide your baby’s hand straight down onto the cardstock, canvas, or clay. Press the palm first, then softly touch each finger down for one or two seconds. Lift the hand straight up to reduce dragging.
For clay, use gentle pressure and avoid pushing the hand too deep. You want a soft imprint, not discomfort. For paper, avoid rocking the hand side to side because that creates smudging.
Expect movement. Babies wiggle, grab, and flex without warning. If the first handprint craft looks messy, keep it as a memory or try again after a short break.
Step 7 – Clean the Hand Right Away
Clean your baby’s hand as soon as you finish the print. Use a damp cloth, warm water, or baby wipes, depending on the material. Work between the tiny fingers and around the nails where paint or ink can hide.
When practicing how to get baby handprint, fast clean-up matters as much as the print itself. Babies put their hands near their mouths often, so remove all product before moving on.
Dry the hand with a soft towel and check for any redness. If your baby seems upset, stop the project and offer comfort before reviewing the finished keepsake.
Step 8 – Let the Print Dry and Store It Safely
Place the finished print on a flat surface where pets, siblings, and curious hands cannot reach it. Drying time depends on the material. Paint may need a few hours, while clay imprint kits may need a full day or more.
Write your baby’s name, age, and date on the back once the print is dry. This small detail makes the memory keepsake more meaningful later. If you plan to frame it, make sure it is fully dry first.
Store extra prints in a folder or baby book. Even a slightly smudged print can become one of your favorite keepsakes.
Common Mistakes When Making a Baby Handprint
One common mistake is using too much paint or ink. A thick layer may seem helpful, but it often turns the palm lines and tiny fingers into one blurry shape. A thin, even layer usually gives a cleaner result.
Another mistake is trying when your baby is already upset. A crying or hungry baby will likely clench the hand, kick, or pull away. Choose a calm moment and stop if your baby becomes uncomfortable.
Some parents press too hard, especially when using clay. Gentle pressure is enough for most baby-safe clay imprint kits. If the clay is too firm, soften it first rather than pushing harder.
It is also easy to forget clean-up supplies. Paint or ink dries quickly in skin folds and around nails. Keep warm water and cloths beside you before you start.
Finally, do not expect the first try to look perfect. Baby keepsakes are often a little wobbly, and that is part of their charm.
Expert Tips
Plan for two or three attempts, especially if you are using cardstock. Babies move fast, and having extra paper reduces pressure. Keep the best print, but do not throw away the imperfect ones too quickly; they often feel more personal later.
Use high-contrast colors for a clear result. Dark ink on white cardstock or soft white paint on colored paper can make tiny lines easier to see. If you want a frame-ready look, leave space around the print for your baby’s name and date.
For newborns, consider doing the handprint while they sleep or after feeding. Work slowly, supervise closely, and stop the moment your baby shows distress.
Frequently Asked Questions
What is the safest material for a baby handprint?
The safest choice is a product labeled baby-safe, non-toxic, and washable. Many parents use a baby-safe ink pad, washable non-toxic paint, or a clay imprint kit made for infants. Avoid permanent ink, adult craft paint, and anything with strong fumes. Always supervise closely and clean your baby’s hand right away.
Can I make a handprint if my baby keeps making a fist?
Yes, but do not force the hand open. Babies naturally curl their fingers, especially newborns. Try when your baby is sleepy, relaxed, or freshly fed. You can gently stroke the back of the hand to encourage opening. If the fist stays tight, pause and try again another time.
Is paint or ink better for a baby handprint?
Both can work well if they are baby-safe and non-toxic. Ink pads often create cleaner detail with less mess. Paint gives you more color choices but can smear if you use too much. Clay is another good option if you want a textured imprint instead of a flat print.
How do I prevent smudging?
Use a thin layer of paint or ink and keep the paper steady. Press the palm down first, then guide the fingers gently. Lift the hand straight up instead of sliding it sideways. Have extra cardstock ready so you can try again without feeling rushed if the first print smears.
What should I do if my baby gets upset?
Stop right away. Wipe your baby’s hand clean, offer comfort, and try again later if you want to. A handprint keepsake is not worth distressing your baby. You may have better luck after a nap, feeding, or bath when your baby feels calmer and more relaxed.
Conclusion
Learning how to get baby handprint helps you create a sweet memory without turning the process into a stressful project. The key steps are simple: choose baby-safe materials, prepare your space, work during a calm moment, use gentle pressure, and clean your baby’s hand right away.
Your print may not look perfect, and that is okay. A tiny smear, curled finger, or uneven edge can make the keepsake feel even more real. What matters most is your baby’s safety and comfort.
Start with one simple print on cardstock or a baby-safe ink pad, then frame or save your favorite result as a lasting memory.

About
Joann Meril didn’t plan on becoming a parenting writer — it found her. After spending several years working as a certified nursing assistant in a pediatric clinic, Joann saw firsthand how anxious and under-informed new parents could feel, even with a hospital full of resources around them. When she had her own two children, that gap became personal. Suddenly she was the one googling things at 2 a.m., comparing baby monitors, and wondering if the swaddle she bought was actually safe.
That experience is what shaped her approach to writing. Joann believes parenting advice should be practical, honest, and free of unnecessary jargon or guilt. She tests products herself whenever possible, reads the actual safety standards instead of just the marketing copy, and isn’t afraid to say when something isn’t worth the money.
Today, Joann writes full-time, covering everything from newborn sleep routines to gear reviews to the small everyday wins that make parenting feel a little less overwhelming. When she’s not researching or writing, she’s usually chasing her own kids around the backyard or drinking coffee that’s gone cold for the third time that morning.
Joann lives in [City/State] with her husband and two children.
Credibility
- Background in pediatric caregiving (CNA)
- Mom of two, hands-on parenting experience
- Hand-tests baby gear before recommending it
- Focus: infant sleep, feeding, gear safety, early development