
That little pool of water sitting at the bottom of your Baby Brezza Washer Pro can feel like a tiny mystery. You loaded bottles, ran a cycle, and now there’s leftover water that needs to go somewhere. Good news: draining it is easy once you know the steps.
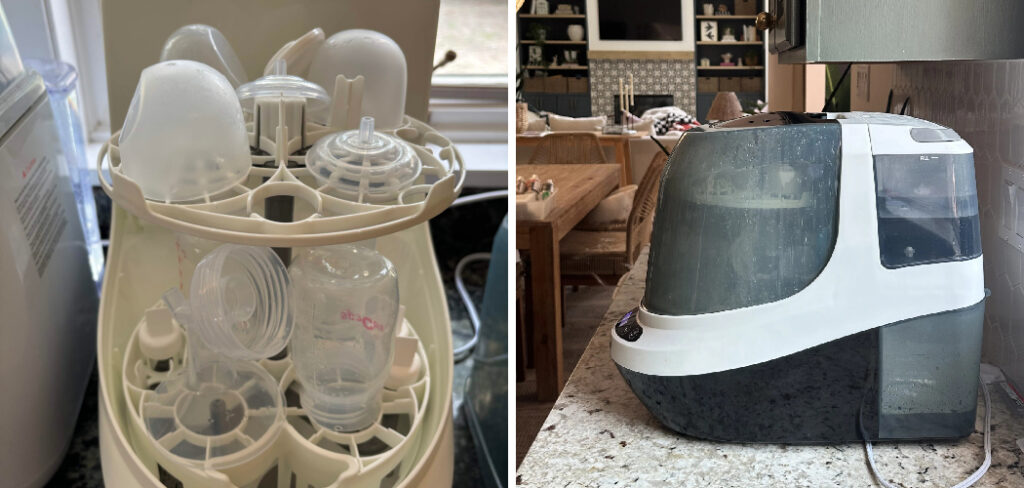
This guide walks you through exactly how to drain baby brezza washer pro the right way. You’ll learn what you need, the steps to follow, mistakes to skip, and how to know you’ve done it correctly. No stress, no guesswork — just a clean machine ready for the next round of bottles.
Why This Matters for New Parents
Leftover water in your washer isn’t just untidy. It can turn into a breeding ground for bacteria, mold, and that musty smell no one wants near baby bottles.
Standing water creates moisture, and moisture invites germs. Since this appliance cleans the things your baby puts in their mouth, keeping it dry and fresh between uses matters more than with most kitchen gadgets.
Here’s the reassuring part: you don’t need to be a tech expert. Draining the washer is a quick maintenance habit, and once you’ve done it a couple of times, it becomes second nature.
What You’ll Need
You don’t need much to get this done. Most of these items are already in your kitchen.
- A clean towel or two: For catching drips and drying surfaces afterward.
- A small bowl or container: Handy if you need to scoop out leftover water.
- A soft sponge or microfiber cloth: For wiping the interior dry.
- Distilled white vinegar (optional): Useful for descaling if you spot mineral buildup.
- Access to a sink or drain: Somewhere to empty the collected water.
That’s it. Keep these within reach before you start so you’re not running around mid-task.
7 Step-by-Step Guide to Drain Your Baby Brezza Washer Pro
Follow these steps in order. Each one is simple, and the tips along the way will help you avoid common snags.
Step 1: Turn Off and Unplug the Machine
Safety comes first. Always power down and unplug the washer before you touch any internal parts.
Tip: Let the machine cool for a few minutes if you’ve just run a hot cycle. The water and surfaces inside can stay warm longer than you’d expect.
Step 2: Open the Lid and Remove the Racks
Lift the lid and take out the bottle racks, baskets, and any accessories inside. Set them aside on a clean towel.
This clears your view and gives you full access to the basin where water collects. Tip: Rinse the racks now while they’re already out — it saves you a step later.
Step 3: Locate the Water Reservoir or Basin
The Baby Brezza Washer Pro holds water in a basin at the bottom of the wash chamber. This is where leftover water from a cycle settles.
Look for any visible water pooled at the base. On most models, the water sits in this lower well rather than draining through a hose, so you’ll be removing it manually.
Step 4: Empty the Standing Water
Tilt the machine gently over your sink to pour out the water, or scoop it with your small container if tilting feels awkward.
Tip: Go slow. Pouring too fast can splash water onto the control panel or electrical parts, which you want to keep dry.
Step 5: Wipe the Interior Dry
Once the water is out, use your sponge or microfiber cloth to dry the basin and inner walls. Reach into the corners where moisture likes to hide.
A dry interior is your best defense against mold and odor. Tip: A cotton swab works well for tight grooves around the bottom of the basin.
Step 6: Descale if Needed
If you notice a white, chalky film, that’s mineral buildup from hard water. Mix equal parts distilled white vinegar and water, pour it into the basin, and let it sit for 10 to 15 minutes.
Wipe it clean afterward and rinse with plain water. Tip: Do this every few weeks if your tap water is hard — it keeps the machine running smoothly.
Step 7: Leave the Lid Open to Air Dry
Before you put everything back, prop the lid open and let the inside breathe for a bit.
Air drying removes any leftover dampness you couldn’t reach with the cloth. This final touch keeps your washer fresh until the next use.
Common Mistakes to Avoid
Even simple tasks come with a few easy-to-make slip-ups. Here are the ones to watch for.
- Leaving water in overnight: Standing water invites mold and bacteria fast. Drain the machine after each cycle, not the next morning.
- Skipping the drying step: Pouring out water isn’t enough. Lingering moisture in the corners still leads to odor and buildup, so always wipe it dry.
- Ignoring mineral buildup: That chalky film won’t go away on its own. Left alone, it can affect how well the machine cleans. Descale regularly.
- Pouring too quickly near electronics: Rushing the tilt-and-pour step can splash the control panel. Keep water away from buttons and plugs.
- Closing the lid right away: Sealing in dampness traps moisture inside. Let the interior air out before closing up.
Safety Tips
A few precautions keep both you and the machine in good shape.
- Always unplug first: Never drain or clean the washer while it’s connected to power.
- Keep water away from electrical parts: The control panel and plug should stay dry at all times.
- Use only gentle cleaners: Stick to vinegar and water or a cleaner the manufacturer approves. Harsh chemicals can leave residue on parts that touch bottles.
- Let hot cycles cool: Give the machine a few minutes after a heated wash before handling internal parts.
- Place on a stable surface: When tilting to drain, make sure the machine is steady so it doesn’t slip from your hands.
Signs You’re Doing It Right
Wondering if you’ve nailed it? These are the markers of a well-drained, well-maintained washer.
- No standing water: The basin is empty after you finish.
- Dry interior: The inner walls and corners feel dry to the touch, not damp.
- Fresh smell: No musty or sour odor when you open the lid.
- No white film: The surfaces look clean, with no chalky mineral spots.
- Smooth cycles: Your next wash runs normally, with no error signals or pooling issues.
If you’re seeing these, you’re doing everything right. Trust yourself — this is one of those tasks that gets easier every time.
Frequently Asked Questions
How often should I drain the Baby Brezza Washer Pro?
Drain it after every cycle. Emptying the leftover water and wiping it dry each time keeps mold and odor away and means less deep cleaning later.
Does the Baby Brezza Washer Pro drain automatically?
No, it doesn’t fully self-drain like a dishwasher. Water collects in the basin and you’ll need to empty it manually, then dry the interior to keep things fresh.
Why is there still water after my cycle finishes?
A small amount of leftover water in the basin is normal at the end of a cycle. Just pour it out and wipe the inside dry — there’s no cause for concern.
Can I use regular soap to clean the inside?
Stick to distilled white vinegar and water for routine cleaning and descaling. Avoid harsh soaps or chemicals, since the machine cleans items your baby uses and you don’t want any residue left behind.
What should I do if I smell a musty odor?
A musty smell usually means moisture got trapped inside. Drain any water, wipe the basin dry, run a vinegar-and-water rinse, then leave the lid open to air out completely.
Final Thoughts on Draining Your Baby Brezza Washer Pro
Learning how to drain the Baby Brezza Washer Pro is one of those small habits that pays off in a big way. A drained, dried, and fresh machine means safe, clean bottles every single time — and that’s a win for you and your little one.
You’ve got everything you need: the steps, the safety tips, and the signs that tell you it’s done right. The first time might feel slow, but it’ll soon become a quick part of your routine.
Take a breath, follow the steps, and know you’re doing a great job keeping your baby’s world clean. You’ve got this.

About
Joann Meril didn’t plan on becoming a parenting writer — it found her. After spending several years working as a certified nursing assistant in a pediatric clinic, Joann saw firsthand how anxious and under-informed new parents could feel, even with a hospital full of resources around them. When she had her own two children, that gap became personal. Suddenly she was the one googling things at 2 a.m., comparing baby monitors, and wondering if the swaddle she bought was actually safe.
That experience is what shaped her approach to writing. Joann believes parenting advice should be practical, honest, and free of unnecessary jargon or guilt. She tests products herself whenever possible, reads the actual safety standards instead of just the marketing copy, and isn’t afraid to say when something isn’t worth the money.
Today, Joann writes full-time, covering everything from newborn sleep routines to gear reviews to the small everyday wins that make parenting feel a little less overwhelming. When she’s not researching or writing, she’s usually chasing her own kids around the backyard or drinking coffee that’s gone cold for the third time that morning.
Joann lives in [City/State] with her husband and two children.
Credibility
- Background in pediatric caregiving (CNA)
- Mom of two, hands-on parenting experience
- Hand-tests baby gear before recommending it
- Focus: infant sleep, feeding, gear safety, early development