

Watching your little one reach for food and try to feed themselves is one of the sweetest parts of weaning. If you’re looking for a soft, snackable treat that practically melts in their mouth, yogurt melts are a wonderful place to start. They’re easy, budget-friendly, and a fun way to introduce new flavors.
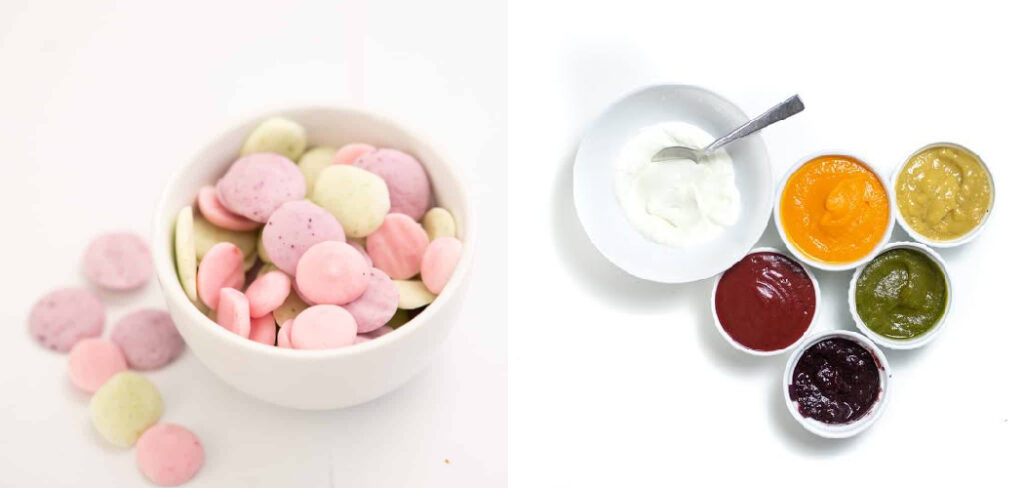
These tiny frozen drops dissolve quickly, which makes them gentle for new eaters. In this guide, you’ll learn exactly how to make yogurt melts for babies at home, when to offer them, how to serve them safely, and what to watch for along the way. Let’s dive in together.
Benefits of Yogurt Melts for Babies
Yogurt is a little powerhouse of nutrition, and that goodness carries right into homemade melts. Whole-milk yogurt gives your baby calcium and protein, which support strong bones and steady growth. The healthy fats in full-fat yogurt also help fuel your baby’s busy, developing brain.
Plain yogurt contains probiotics too. These are the friendly bacteria that help keep your baby’s tummy happy and support healthy digestion. A balanced gut can make the whole weaning journey smoother.
Beyond nutrition, yogurt melts help build important skills. Picking up small pieces strengthens that pincer grasp, the thumb-and-finger pinch babies use to feed themselves. Self-feeding also boosts confidence and lets your baby explore food at their own pace.
When Can Babies Start Eating Yogurt Melts
Most babies are ready for yogurt melts around 6 months, once they’ve started solids. By this stage, your baby can usually sit up with support and shows interest in food. Always check that your baby can manage soft textures before offering melts.
The good news is that dairy in yogurt is generally fine from 6 months, even though plain cow’s milk as a drink isn’t recommended until 12 months. The fermentation process makes yogurt easier to digest. Choose plain, full-fat, unsweetened yogurt for the best nutrition.
A quick note on allergies. Dairy is one of the more common food allergens, so introduce yogurt on its own first before turning it into melts. Offer a small amount of plain yogurt and wait a few days to watch for any reaction. Once you know your baby tolerates it well, you’re ready to make melts.
What You’ll Need
Making yogurt melts is wonderfully simple. You likely have most of what you need already in your kitchen.
Ingredients:
- Plain, full-fat (whole-milk) yogurt, unsweetened
- Optional: a spoonful of fruit puree for natural flavor (banana, mango, or berry work beautifully)
Equipment:
- A baking tray or flat plate that fits in your freezer
- Parchment paper or a silicone baking mat
- A piping bag, a small zip-top bag with a corner snipped off, or a squeeze bottle
- A small spoon for mixing
- An airtight container for storage
That’s it. No fancy gadgets required, just a steady hand and a little freezer space.
Step-by-Step Preparation Guide on How to Make Yogurt Melts for Babies
Here’s the easy part. Follow these steps and you’ll have a batch of melts ready in no time.
- Wash up. Wash your hands and clean all your equipment well. A clean workspace keeps everything safe for your baby.
- Mix the yogurt. Spoon your plain yogurt into a bowl. If you’d like to add flavor, stir in a small spoonful of fruit puree until smooth.
- Fill your piping tool. Spoon the yogurt into a piping bag or zip-top bag. If using a zip-top bag, snip a tiny corner off the bottom.
- Pipe small dots. Squeeze small, dime-sized dots onto your parchment-lined tray. Leave a little space between each one. Smaller dots melt faster and are easier for new eaters.
- Freeze. Place the tray flat in the freezer. Let the melts freeze for at least 1 to 2 hours, until they’re firm and easy to peel off.
- Peel and store. Once frozen solid, gently peel the melts off the parchment. They’re ready to serve or store.
The whole process takes about 10 minutes of hands-on time, plus freezing. Easy, right?
How to Serve by Age/Stage
Babies change quickly, so how you serve melts will shift as your little one grows.
Around 6 to 8 Months
Start with very small dots that dissolve fast. Place one melt at a time on the tray or directly into your baby’s hand. Stay close and let them explore the cool, soft texture.
Around 9 to 12 Months
By now your baby’s pincer grasp is sharper. You can offer a few melts at once on a plate or tray and let them practice picking up each one. This builds independence and fine motor skills.
12 Months and Beyond
Toddlers can enjoy melts as a quick, fun snack. Keep dots small and serve a handful at a time. They’re great for on-the-go moments and warm days.
A gentle reminder for every stage: always serve melts when your baby is sitting upright, never lying down or while distracted.
Storage and Freezing Tips
Homemade yogurt melts are made to live in the freezer, which makes them super convenient. Store them in an airtight container or freezer bag for up to 1 to 2 months. Label the container with the date so you always know how fresh they are.
Because they melt quickly at room temperature, serve them straight from the freezer. Take out only what you need for one sitting. Avoid refreezing any that have softened or melted, as this isn’t safe.
If you’ve added fruit puree, use that batch within a month for the best flavor and texture. Keep your freezer at a steady cold temperature to keep the melts firm and fresh.
Common Mistakes to Avoid
Even simple recipes have a few easy-to-miss pitfalls. Here are the most common ones, plus how to sidestep them.
Making the dots too big. Large melts take longer to dissolve and can feel awkward in tiny mouths. Keep them small, around the size of a dime or smaller.
Using sweetened or flavored yogurt. Store-bought flavored yogurts often pack in added sugar. Always choose plain, unsweetened, full-fat yogurt and add your own fruit if you want flavor.
Serving them half-frozen. Melts that have softened too much can become slippery and harder to handle. Serve them firm and fresh from the freezer.
Skipping the single-food test. Turning yogurt into melts before confirming your baby tolerates dairy makes it harder to spot a reaction. Introduce plain yogurt on its own first.
Leaving baby unattended. Always stay within arm’s reach during snack time. Your presence keeps mealtime safe and reassuring.
Allergy Information and Safety Tips
Since yogurt melts are dairy-based, allergies are worth a gentle mention. Cow’s milk is a common allergen for babies, so introduce yogurt slowly and on its own first. Offer a small taste, then wait two to three days before adding anything new.
Watch for signs of a reaction after that first taste. These can include a skin rash, hives, swelling around the lips or face, vomiting, or unusual fussiness. Most reactions are mild, but it helps to know what to look for so you feel calm and prepared.
Now, about choking. The lovely thing about yogurt melts is that they dissolve almost instantly, which makes them low-risk. Still, safe habits matter. Always have your baby sit upright while eating, offer one melt at a time for new eaters, and never leave your baby alone with food.
If your family has a history of food allergies, it’s a great idea to chat with your pediatrician before introducing dairy. A quick conversation can give you extra peace of mind.
Signs Baby Is Ready and Enjoying It
You’ll often see the joy on your baby’s face when they like a new food. Reaching for more, opening their mouth eagerly, and happy little sounds are all great signs. Smooth, calm swallowing tells you they’re handling the texture well.
Other signs your baby is doing well include no rash or tummy troubles afterward, and steady interest in self-feeding. Some babies make funny faces at the cold texture at first, and that’s completely normal. Exploring is part of learning.
Remember, every baby moves at their own speed. If your little one isn’t sure at first, simply try again another day. There’s no rush.
When to Call a Doctor
Most snack times go beautifully, but it’s always smart to know the warning signs. Call your doctor if you notice signs of an allergic reaction, such as hives, swelling, vomiting, or trouble breathing after eating yogurt. Breathing difficulty or severe swelling needs emergency help right away, so don’t hesitate to call for urgent care.
Reach out to your pediatrician if your baby has ongoing digestive issues like diarrhea, persistent rash, or a lot of discomfort after dairy. These could point to a sensitivity worth checking.
For choking, even though melts are low-risk, learn the difference between gagging and choking. Gagging is loud and normal as babies learn to eat. Silent struggling, no sound, or color changes mean you should act fast and seek emergency help. Knowing infant first aid gives you confidence and calm.
Frequently Asked Questions
Can I make yogurt melts without a piping bag?
Yes, absolutely. A small zip-top bag with a tiny corner snipped off works perfectly. You can even use a spoon to drop small dots onto the tray.
Why don’t my yogurt melts stay solid at room temperature?
Homemade melts don’t contain the stabilizers found in store-bought versions, so they soften quickly. Serve them straight from the freezer and offer only a few at a time.
Can I use Greek yogurt for melts?
Yes, full-fat Greek yogurt works well and is thicker, which can make piping easier. Just make sure it’s plain and unsweetened.
Do I need to add fruit or sweetener?
No sweetener is needed, and it’s best to skip it for babies. Plain yogurt is delicious on its own, but a spoonful of fruit puree adds natural flavor if you’d like.
How many yogurt melts can my baby have?
A small handful as a snack is plenty for most babies. Treat melts as one part of a varied diet rather than a main meal.
Final Thoughts on How to Make Yogurt Melts for Babies
Learning how to make yogurt melts for babies is a small win that brings a lot of joy to mealtime. They’re simple to whip up, gentle on little mouths, and a fun way for your baby to practice self-feeding. With a tray, some plain yogurt, and a little freezer time, you’ve got a wholesome snack ready to go.
Every new food is a step in your baby’s growing adventure, and a few funny faces along the way are all part of the fun. Trust your instincts, take it slow, and enjoy these messy, wonderful moments. You’re doing a great job, and your baby is lucky to have you guiding the way.

About
Joann Meril didn’t plan on becoming a parenting writer — it found her. After spending several years working as a certified nursing assistant in a pediatric clinic, Joann saw firsthand how anxious and under-informed new parents could feel, even with a hospital full of resources around them. When she had her own two children, that gap became personal. Suddenly she was the one googling things at 2 a.m., comparing baby monitors, and wondering if the swaddle she bought was actually safe.
That experience is what shaped her approach to writing. Joann believes parenting advice should be practical, honest, and free of unnecessary jargon or guilt. She tests products herself whenever possible, reads the actual safety standards instead of just the marketing copy, and isn’t afraid to say when something isn’t worth the money.
Today, Joann writes full-time, covering everything from newborn sleep routines to gear reviews to the small everyday wins that make parenting feel a little less overwhelming. When she’s not researching or writing, she’s usually chasing her own kids around the backyard or drinking coffee that’s gone cold for the third time that morning.
Joann lives in [City/State] with her husband and two children.
Credibility
- Background in pediatric caregiving (CNA)
- Mom of two, hands-on parenting experience
- Hand-tests baby gear before recommending it
- Focus: infant sleep, feeding, gear safety, early development