

A baby’s newly pierced ears need gentle, steady care while the tiny holes heal. Because infant earlobes are soft and sensitive, even small amounts of dried crust, rubbing, or dirty hands can cause irritation. The good news is that aftercare does not need to feel scary or complicated.
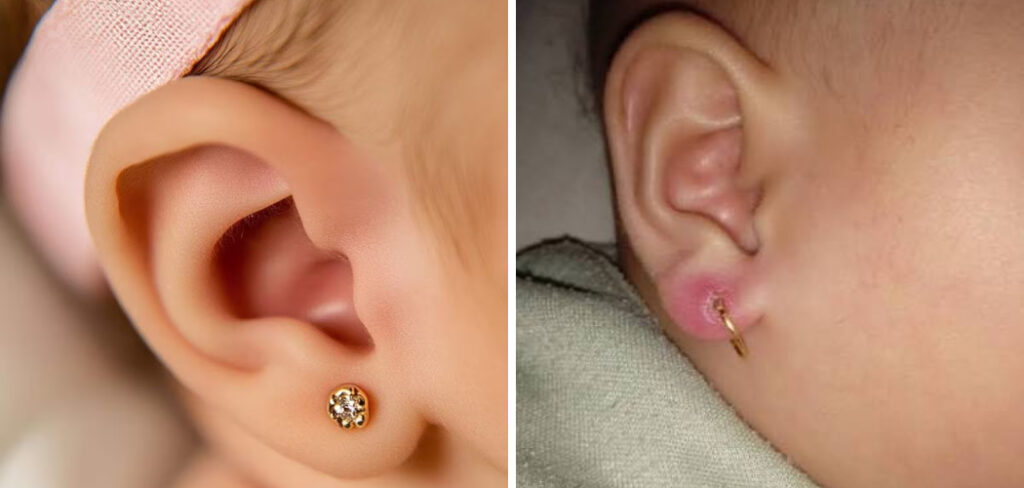
Learning how to clean baby ear piercing helps you protect the area, reduce infection risk, and keep your baby comfortable during the healing process. With clean hands, the right solution, and a calm routine, you can care for the piercing without pulling, twisting, or upsetting your baby.
This guide explains the safest way to clean a baby’s ear piercing, what tools to use, what signs to watch for, and when to call a pediatrician.
Why Proper Baby Ear Piercing Cleaning Matters
Proper infant ear piercing aftercare supports healing, comfort, and hygiene. A fresh piercing is a small wound, so the skin around the earring post needs time to close and settle. During that healing timeline, sweat, milk drips, lint, and dried fluid can collect around the front or back of the earlobe.
Gentle cleaning helps remove buildup without disturbing the piercing. It also gives you a daily chance to check for redness, swelling, crusting, irritation, or infection signs. This matters because babies cannot tell you when an earlobe feels sore or itchy.
A clean, calm routine also helps prevent unnecessary touching. The less you handle the earrings outside of cleaning, the better the healing process usually goes.
Tools and Materials You’ll Need
You only need a few simple supplies for safe piercing aftercare. Choose clean, gentle materials and avoid harsh products unless your pediatrician gives specific instructions.
- Sterile saline solution made for wound wash or piercing care
- Sterile gauze pads or clean cotton pads
- Clean towel or bib
- Mild soap and water for washing your hands
- Good lighting so you can see the front and back of the earlobe
- A comfortable chair or safe place to hold your baby
- Hypoallergenic earrings already placed by the piercer
- Optional convenience item: sterile saline wipes for quick, gentle cleaning
Keep supplies together in one clean spot. This makes cleaning faster and helps you avoid searching for items while holding your baby.
7 Step-by-Step Guide on How to Clean Baby Ear Piercing
Step 1 – Choose a Calm Time and Safe Position
Start when your baby is calm, fed, and not overly tired. Warm bath lighting or a quiet room can help the routine feel softer and less rushed. A relaxed baby is less likely to turn suddenly or reach for the earring.
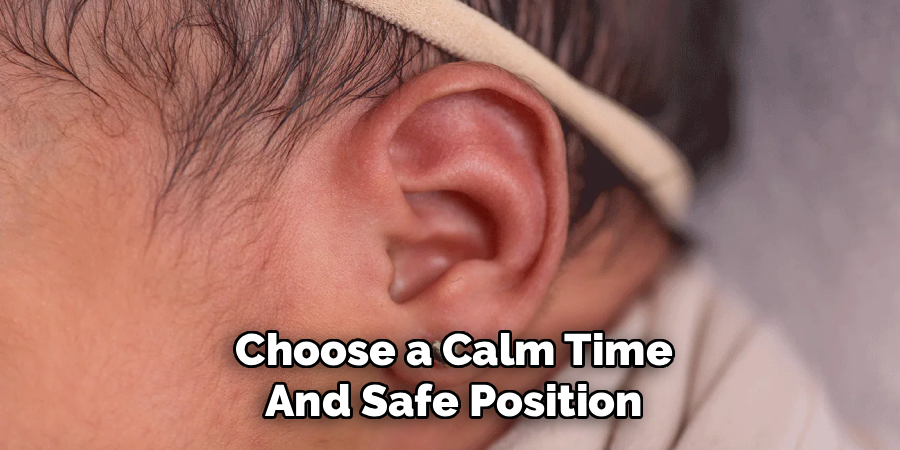
Learning how to clean baby ear piercing begins with a secure hold. Sit down and support your baby’s head and shoulders against your chest or in your lap. You want the hold to feel firm but gentle, like a safe cuddle rather than restraint.
If your baby squirms, pause. A short break is better than cleaning while the earlobe moves.
Step 2 – Wash Your Hands Thoroughly
Wash your hands with soap and warm water before touching the earrings or earlobes. Scrub between your fingers and under your nails, then dry with a clean towel. Your hands carry germs even when they look clean.
Avoid using scented lotion right before cleaning. Fragrance or oil can transfer to the piercing and irritate the skin. If another caregiver helps, they should wash their hands too.
This step may seem basic, but it is one of the most important parts of earlobe care. Clean hands lower the chance of introducing bacteria to the fresh piercing.
Step 3 – Check the Earrings and Earlobes First
Before applying saline solution, look closely at both ears. Check the front and back of each tiny earlobe. You may see light crusting near the post, mild pinkness, or a small amount of clear dried fluid during early healing.
Use good light so you do not miss the area behind the ear. The back of the earring can collect buildup because it rests close to the skin.
Do not pull the earring forward to inspect it. Just look gently and note any changes. Increasing redness, heat, swelling, pus, or a bad smell may mean you need medical advice.
Step 4 – Soften Crust With Saline Solution
Apply sterile saline solution to a gauze pad or clean cotton pad. It should feel cool and damp, not dripping wet. Press it softly against the front of the earlobe for a few seconds to loosen dried crust near the post.
When practicing how to clean baby ear piercing, think “soften and lift,” not “scrub and scrape.” Crust can cling to the jewelry, and rough wiping may irritate the piercing channel.
If the buildup does not come away easily, add a little more saline and wait. Gentle patience protects tender skin better than force.
Step 5 – Clean the Front of the Piercing
Use a fresh part of the damp gauze to wipe around the front of the earring. Move slowly in a small circle around the post without pushing the jewelry into the ear. The pressure should feel light, like dabbing a tear from delicate skin.
If your baby turns their head, stop and steady them again. Sudden movement can make even a gentle wipe feel sharp.
Do not twist the earring unless your piercer or pediatrician specifically told you to do so. Many modern aftercare instructions advise leaving the jewelry still so the healing tissue is not disturbed.
Step 6 – Clean Behind the Earlobe
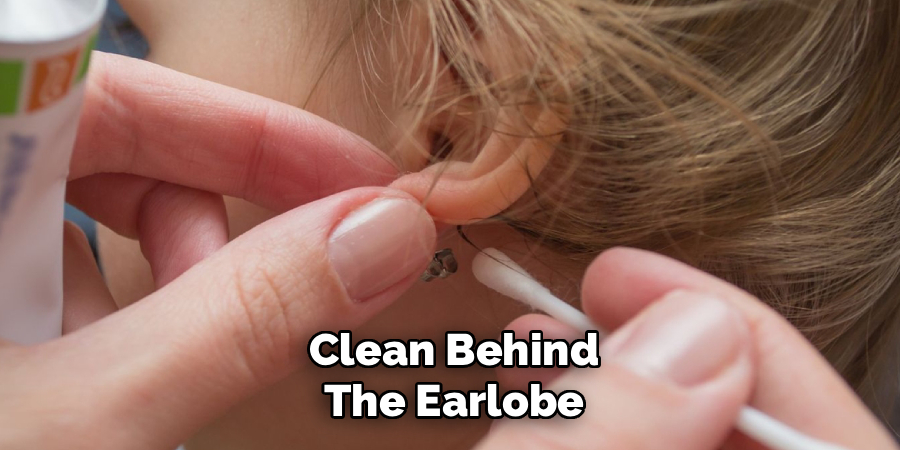
The back of the earlobe needs the same careful attention. Dried fluid, lint, and skin oils can collect where the backing sits close to the ear. Tilt your baby’s head gently, or have another adult help keep your baby still.
Dampen a new gauze pad with saline and clean around the back of the post. Keep your touch soft and slow. You may feel the small curve of the earring back through the gauze, so avoid pressing hard.
Make sure the backing is not squeezed tightly against the earlobe. There should be a little breathing room unless your piercer gave different instructions.
Step 7 – Let the Area Dry and Avoid Extra Touching
After cleaning, let the ears air-dry for a short time. If needed, pat nearby skin with clean gauze, but do not rub the piercing. Moisture trapped around the earring can make irritation worse, especially behind the lobe.
Once the area looks clean and dry, leave it alone. Avoid checking the earrings again and again throughout the day. Too much touching can slow the healing process.
Keep hair, hat edges, blankets, and clothing from snagging on the earrings. A calm finish helps your baby move on without fuss and keeps the routine positive.
Common Mistakes When Cleaning a Baby Ear Piercing
One common mistake is using alcohol, hydrogen peroxide, or strong antiseptics without medical guidance. These products can dry and irritate a baby’s delicate skin. Saline solution is usually gentler for daily cleaning, unless your pediatrician recommends something else.
Another mistake is twisting the earrings every time you clean. Some older aftercare advice suggested turning earrings, but this can disturb healing tissue. Only turn earrings if your piercer or pediatrician clearly tells you to.
Caregivers also sometimes clean too aggressively when they see crusting. A little dried fluid can be part of normal healing. Soften it with saline and wipe gently instead of scraping.
A fourth mistake is ignoring early infection signs. Redness that spreads, swelling that worsens, warmth, pus, bleeding, fever, or obvious pain needs attention. Call your pediatrician if you are unsure.
Finally, avoid changing earrings too soon. The piercing may look healed on the outside before the inner channel is ready.
Expert Tips
Keep the cleaning routine simple and consistent. Most babies do best when aftercare happens at the same time each day, such as after a bath or before bedtime. Warm lighting, a clean towel, and a calm voice can make the process easier.
Use hypoallergenic earrings made for sensitive skin, especially during the first healing period. If you notice repeated redness or irritation, the metal may be part of the problem.
Watch your baby’s hands, hats, and sleep position. Babies may tug at earrings without meaning to, and fabric can catch on small studs. If something looks worse instead of better, contact your pediatrician rather than trying stronger products at home.
Frequently Asked Questions
How Often Should I Clean My Baby’s Ear Piercing?
Follow the aftercare instructions from your piercer or pediatrician. Many recommend gentle cleaning once or twice daily during the early healing process. More cleaning is not always better, because too much wiping can irritate the earlobe. Keep the routine clean, brief, and gentle, and avoid touching the earrings outside of aftercare.
What Is Normal After a Baby Ear Piercing?
Mild redness, slight swelling, and light crusting can be normal at first. You may see a small amount of clear or pale dried fluid around the post. The area should slowly look calmer over time. Strong pain, spreading redness, yellow or green discharge, warmth, bleeding, or fever are not signs to ignore.
Can I Use Alcohol to Clean the Piercing?
Do not use alcohol unless your pediatrician specifically tells you to. Alcohol can sting, dry the skin, and slow comfort during healing. Sterile saline solution is usually a gentler choice for routine piercing aftercare. If you think the piercing is infected, call your baby’s doctor instead of switching to harsh products on your own.
Should I Remove the Earrings if the Ear Looks Infected?
Do not remove the earrings without medical advice. Taking jewelry out can sometimes trap infection inside the piercing channel as the skin closes. If you notice pus, severe swelling, spreading redness, fever, or your baby seems very uncomfortable, call your pediatrician promptly. They can tell you whether the earrings should stay in or come out.
How Long Does a Baby Ear Piercing Take to Heal?
Healing time varies, but many earlobe piercings take several weeks to a few months to fully settle. The outside may look healed before the inside is strong. Keep following aftercare instructions and avoid changing earrings too early. Your piercer or pediatrician can give guidance based on your baby’s age, skin reaction, and healing progress.
Conclusion
Caring for a baby’s pierced ears takes a gentle hand, clean supplies, and patience. Use sterile saline solution, soft gauze, and light pressure to clean around the front and back of each earlobe. Watch for normal crusting, but stay alert for redness, swelling, heat, pus, or other infection signs.
Once you understand how to clean baby ear piercing, the routine becomes easier and less stressful. Choose a calm time, hold your baby securely, avoid unnecessary touching, and do not twist or change earrings unless a professional advises it.
Small daily habits can make a big difference in comfort and healing. If anything looks unusual or your baby seems in pain, call your pediatrician. With steady aftercare, you can help your baby’s new earrings heal safely and comfortably.

About
Joann Meril didn’t plan on becoming a parenting writer — it found her. After spending several years working as a certified nursing assistant in a pediatric clinic, Joann saw firsthand how anxious and under-informed new parents could feel, even with a hospital full of resources around them. When she had her own two children, that gap became personal. Suddenly she was the one googling things at 2 a.m., comparing baby monitors, and wondering if the swaddle she bought was actually safe.
That experience is what shaped her approach to writing. Joann believes parenting advice should be practical, honest, and free of unnecessary jargon or guilt. She tests products herself whenever possible, reads the actual safety standards instead of just the marketing copy, and isn’t afraid to say when something isn’t worth the money.
Today, Joann writes full-time, covering everything from newborn sleep routines to gear reviews to the small everyday wins that make parenting feel a little less overwhelming. When she’s not researching or writing, she’s usually chasing her own kids around the backyard or drinking coffee that’s gone cold for the third time that morning.
Joann lives in [City/State] with her husband and two children.
Credibility
- Background in pediatric caregiving (CNA)
- Mom of two, hands-on parenting experience
- Hand-tests baby gear before recommending it
- Focus: infant sleep, feeding, gear safety, early development